Sunday, November 15, 2009

Bindi Dot Love

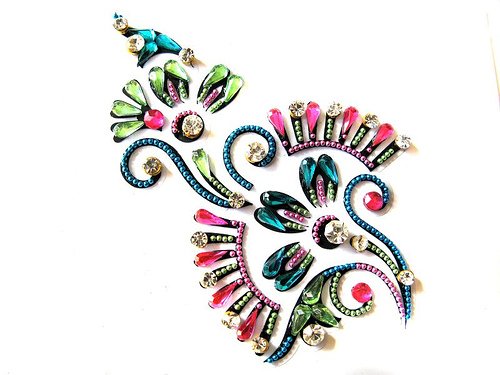
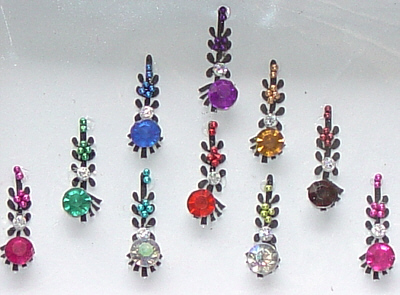
I attended a birthday party last night for a good friend of mine who happens to be of Indian descent.  She had bindis for the ladies to wear and I absolutely LOVE them!!  I want to wear one every day.  There are so many different types and colors, plus they're SO inexpensive at the Indian grocery store! 


(This pic is me with Little Bear, if you haven't already guessed that.)

Really, how could I not love bindis?  Now I need to invite the girls over and have another henna party!!


Thursday, November 12, 2009

Veterans' Day Crafting

Little Bear and I wanted to do something special for veterans yesterday, so we made some cards to send to our local VA hospital.  I printed outlines of American flags on cardstock - two per page - then cut the pages in half, so that there was one flag on each "card." 


Little Bear colored the flags, then wrote sweet little messages to the veterans on the other side.  I folded them in half with the flags on the outside and they were done. 


I wrote a letter to the hospital staff, asking them to distribute the cards, then dropped them in the mail. 


What a fun way to instill in Little Bear a sense of respect for members of the military!

Wednesday, November 11, 2009

Pretty Holiday Photo Holder

I wanted to make something cute to give to my former boss for Christmas.  I'll probably make her an ornament for her tree, as well, but I think she'll like this and it was SO EASY!  I bought the wooden word "Faith" for $1 at, where else?, the Dollar Tree.  The rest of the materials I had on hand.

Materials:
Wooden word
Red Sharpie
Glitter
Tiny Clothespins

I colored the whole thing with the sharpie first, and it ended up looking like a red wood stain.  I liked it!


Don't laugh too much at my black fingers.  I was trying to dye some fabric and, well, when they say "wear rubber gloves," they mean it!!


I painted glue on the letters and shook my crystal glitter over them, one letter at a time, then glittered the front of the base, also.


 Once the glitter was finished, I glued tiny clothespins to the backs of each letter.


Once the glue was dry, it was ready to be boxed, wrapped and given.  So easy!


Embellished Notecards

Any time I see packages of stationary or notecards on sale, I pick them up.  I probably shouldn't, since I have so many lying around, but it's quite useful to have them when you find you've forgotten to get someone a birthday card.  I rarely give them out as-is, though.  I have to make them my own, first!

Here are three designs I made using a little package of blank notecards:


I love having multiples of the same card!  For this one, I cut the dog shape
out of one card and tied a green ribbon around its neck. 
 

Next, I  punched tiny circles out of the back of the card, which was pink.
I glued these circles to the front of the second card, around the dog.


Once those were glued on, I used foam tape to stick the dog cut out directly
on top of the dog on the second card.


 For the second card, I painted glue on a few of the white flowers on the front of the card.  I had colored sand leftover from another project, so I poured pink sand on the petals, then added a dot of glue and some yellow sand for the centers.


I really liked the green bow on the first card, so I added a collar of green sand on the dog.


Lastly, I made a strip of green sand at the top of the inside of the card.


For the last one, I cut the dog out of the front with my craft knife.  I put double stick tape around the edges of the inside cover, then cut it away where it overlapped the dog cutout.


I had a plastic bag from some tissue paper I bought before my buy-nothing month started,
so I layed it on the tape, with one seam along the top, smoothing the plastic as I went.  Next, I trimmed the plastic to about an inch around the card, leaving me with a plastic flap.


I used more double stick tape on the vertical edges of the card, inside the plastic.  I smoothed the second layer of the plastic bag down on the tape, creating a little pouch with the bottom open.  I trimmed the plastic from the sides of the card, but left the excess plastic on the bottom edge.  I poured about a teaspoon of my new favorite crystal glitter into the pouch, then folded up the excess plastic and taped it with one-sided tape.


I adhered the dog shape to the inside of the card with my trusty double stick tape, directly under the dog-shaped window in the front, and the card was finished.  So cute!  I think this one is my favorite!


Sunday, November 8, 2009

Recycled Notepad Teacher Gift

What I've learned since this August:  Kindergarten uses lots of paper!  Little Bear comes home with new paper every day; notes from the teacher, permission slips, flyers for fundraisers, PTO event notifications, fun ideas to do at home, etc.  Many of these are printed on colored paper and only on one side.  My great grandmother - we call her Great M - turned 93 this September.  I love her thrifty ways; born of necessity and continued mostly out of habit.   This project reminded me of her because of the many times I've seen her write grocery lists, phone numbers, or even snail-mail notes in the margins and blank spaces on a printed flyer or brochure.  Great M's tiny carbon footprint could compete with even the hippest patchouli-wearing, tree-hugging, organic vegan recycler in Berkeley. 


You know how Little Bear loves to recycle, right?  Well, she also loves to give her creations away to friends and family.  She is really excited about the idea of recycling school papers into a cute notepad for Mrs. B.  I have to keep reminding her that I can't cut up every paper she sees, since that often includes bills, insurance company mailings, homework...

Materials used:
  • scrap paper
  • Shoe Goo
  • tiny stamp
  • stamp ink
 Tools needed:

  • Medium C-clamp
  • two small wood blocks

I decided on a size for the notepad - 2 1/2" x 3 1/2" - based on the smallest pieces of paper that I had in my to reuse pile.  The pile included papers from Mrs. B, junk mail, used envelopes, grocery lists, and other random papers with one blank side.  Using my good ole Fiskars paper cutter, I cut hundreds (or at least it felt like hundreds) of paper rectangles.  Fortunately, I don't often watch television, so Hulu.com had plenty of new-to-me material to keep me entertained while I cut.

I cut most of these in one evening, but I ran out of scrap paper before I had as many pages as I wanted.  Over the next couple of weeks, I would sit down for a few minutes each night and cut up any new scrap paper I had.  It really made me keep an eye out for pretty paper that was being wasted.  I picked up  flyers, memos, and copies of last month's calender from my office that were printed on colored paper or printed with color backgrounds on white paper and were headed for the recycle bin with the rest of our department's used paper.

I have to interrupt the notepad tutorial for a moment here to praise my department for a moment here.  I work in the Purchasing department of a global corporation.  Recycling has been a company-wide practice for a long time now, but in the past six months, my department has drastically reduced the amount of paper we use.  We have moved to storing documents electronically and we are using fax software that allows us to send and receive faxes from our computers.  As I tell Little Bear, "Reduce, Reuse, Recycle - in that order."


While I was gathering pages for the notepad, Little Bear picked out a stamp and ink pad and went to work adding just this little embellishment to the gift.  It made it infinitely cuter and Little Bear got to say, "I did this!"  Don't you just love that?


She stamped until she couldn't stamp anymore, then Mommy lent a hand.  We took the stamped pages and shuffled them randomly throughout the pile, making sure to put one on top of the stack.  I lined up the top edge of the pages as evenly as I could, which gave the rest of the edges interesting texture, and clamped it tight between two scrap blocks of wood.  Because the Shoe Goo is so thick, I just smeared it on with my finger, then smoothed the surface with a straight edge.


I left it clamped for 24 hours, until the glue was completely dry.  Then I took off the clamp and wood blocks and used a craft knife to trim off any excess glue. I will tie a pretty ribbon around it with a cardstock tag, and it's ready for gifting.


Saturday, November 7, 2009

Sweater-Dress-Blouse-Thingy

In the time since I started this blog, I have found so many wonderful clothing redesign and refashion inspirations!  I am always happy to see that I am not the only person who feels compelled to make what she knows she could buy.  This sweater-dress combo that ended up as a blouse, of sorts, is my favorite of the refashions I've done so far.  I loved the colors, the waist, and the neckline of this dress, but it was shorter than I was comfortable wearing, and not especially flattering on my body shape.


  As usual, I forgot to take "before" pictures, but this one is early on in the process.  Along with the dress, I had a purple sweater that Mom found for me last fall.  It's a beautiful color and sooooo soft, but the shape was too boxy and the torso too short for my liking.  I cut the sleeves off at the shoulder seam, but probably should have sewn a straight stitch around it first, to prevent unraveling.  I didn't have too many problems, but I suggest stitching before cutting, if you think it might unravel.

I sewed the sleeve into the dress at the shoulder seam, so that the dress sleeves were left hanging free over them.  Unfortunately, after I got both sleeves on, I realized that the second one was inside out!  I was afraid that I would end up with a big, unraveled mess if I tried to un-stitch the sleeve, so I decided to go with it.  The two don't look all that different, unless you look really closely, anyway.

I cut the dress to shirt-length and left the edges raw.  Again, if I had thought ahead, I would have stitched around the bottom of the sweater before I cut it, but that didn't happen.  I cut the bottom 4" off the sweater and stitched it to the bottom of the dress, about an inch from the cut edge.


After wearing it like that once, I came to the conclusion that the sleeves were a little shorter than I was comfortable with. To fix that, I unraveled what was left of the sweater (instructions) and started crocheting.  The sweater sleeves were knitted, of course, but you can hardly tell the difference.  I started out with one single crochet in each knit stitch, then did two single crochets in each stitch for three rows.  I added three more rows of one single crochet per stitch and tied it off.
 
I absolutely adore it now!  It's my favorite thing to wear!