Showing posts with label easy. Show all posts

Thursday, November 19, 2009

Unique Notes

I love sending snail mail, but even the prettiest stationary gets a little boring at times.  Here are some ideas for sending snail mail notes on unusual mediums.


  • Ribbon Letter
For this one, I used an empty ribbon spool and a 12" x 12" piece of scrapbook paper.  I cut circles out to cover the top and bottom of the spool, then cut the rest into 3/8" strips, to fit on the spool.  I wrote the letter on the strips, keeping them in order, then taped the last one to the spool and started winding.  At the end of each strip, i taped the next one on and kept winding, until I got all the way to "Dear Bonnie," at the begining. 


  • Book Greeting Card
I found this paperback at Deals for a dollar and, knowing how my grandpa LOVES westerns, thought I would send him a little note in it.  I wrote the words very lightly in pencil, then Little Bear traced them.  I think he'll love it - I know I would!


  • Seed Packet Card
Garden or farming supply stores have seeIf you don't want to write your note directly on the seed packet, or there isn't room, just print out this template from The Month of the Military Child to make your own packet.  Either way, a sweet note written on a packet of seeds would make any gardener happy.


  • CD Greetings
Know a music lover?  Take the cover art out of the jewel case of a CD you know they'll love.  Cut a piece of plain paper to fold in half and replace the cover art.  Design your own cover art on the outside and write your friend a note on the inside.  Mail it in a padded envelope or CD box.  Alternatively, you could record your child/children singing, reading, and telling stories.  Let them design the cover art for an empty jewel case, burn their recordings to a recordable CD, and you have a lovely way to send a letter to Grandma and Grandpa.


  • Message in a Bottle
Write or print your letter on some pretty stationary and put it in an envelope.  Wash out a plastic soda or water bottle (make sure it's big enough for whatever you're sending) and let it dry thoroughly, then remove the label.  Super glue the lid onto the bottle, then cut two 4 or 5 inch vertical slits in the side, connected by a horizontal cut (making a tall, skinny H shape).  Fill the bottle with shredded paper or tissue paper, then slip your letter inside.  You can also put small gifts in the bottle to go with the letter.  Seal the opening with clear packing tape, then cover the opening with a self-stick shipping label and take it to the post office.  (I haven't tried this yet. The pic is from Instructables.)

Have other ideas for unusual snail mail mediums?  Share with us!

Wednesday, November 11, 2009

Pretty Holiday Photo Holder

I wanted to make something cute to give to my former boss for Christmas.  I'll probably make her an ornament for her tree, as well, but I think she'll like this and it was SO EASY!  I bought the wooden word "Faith" for $1 at, where else?, the Dollar Tree.  The rest of the materials I had on hand.

Materials:
Wooden word
Red Sharpie
Glitter
Tiny Clothespins

I colored the whole thing with the sharpie first, and it ended up looking like a red wood stain.  I liked it!


Don't laugh too much at my black fingers.  I was trying to dye some fabric and, well, when they say "wear rubber gloves," they mean it!!


I painted glue on the letters and shook my crystal glitter over them, one letter at a time, then glittered the front of the base, also.


 Once the glitter was finished, I glued tiny clothespins to the backs of each letter.


Once the glue was dry, it was ready to be boxed, wrapped and given.  So easy!


Friday, November 6, 2009

Fall Tablescaping


At my day job, I work in the basement of my building, amid a vast and somewhat depressing sea of oatmeal colored cubicles.  In the group of four desks where I spend my days, the girls on one side took the initiative to add some fall color to their dreary space a while back.


Well, being the competitive person I am, I couldn't just sit back and let someone show me up like that.  I found this wooden bucket at a thrift store for $1, the fake sunflowers, silk leaves and berry garland on clearance at Michaels, and I picked the pinecone and acorns up outside for free!  I think it turned out pretty cute!

Thursday, November 5, 2009

Educational and Pretty Memory Game

Baby Bear... *ahem* excuse me!  Little Bear has decided that she is much too old to be called Baby Bear.  "Baby Bear is for babies, but Little Bear is a good nickname for a kindergartner," she told me.

Little Bear's kindergarten teacher, Mrs. B, sent home three sheets of pink paper last week.  They were printed with rectangles, containing pairs of the words the class has worked on.  The instructions included with these sheets directed me to cut the rectangles out and play a memory game with my child.  Of course, I couldn't just cut them out and leave it at that.


First of all, if the light was behind them, you could see the word right through the back of the cards.  To fix this problem, I got out my Valentine's Day cardstock.  I covered the backs of the sheets of sight words with my trusty glue stick and laid them on the cardstock, making sure the cardstock pattern was going the same direction on all of them.  If the pattern isn't consistant, Little Bear would probably notice and she would remember the backs of the cards, rather than the words I was trying to teach her.  I cut the cards out and then realized there weren't very many.  Using plain paper and the remaining heart-patterned cardstock, I added some more of the sight words for kindergarten, referencing the list Mrs. B sent home last month.  Once I had gotten as many card pairs as possible from my piece of cardstock, I decided they needed a box.  Every good card game needs a box, right?

I went to the cabinet under my kitchen sink, where my recycleables live until I take them out to the big recycling bin in the back yard, and found a allergy nose spray box.  **I feel the need to pause here and ponder the possible justifications for double-packaging things.  I realize that those boxes are easier to stack than the bottles, but what a waste!**

Okay, I'm back now.  On the open top of the box, there are four flaps.  Of the two longer sides, one flap is smaller than the other.  I cut that one off at the crease, taped it to the larger flap, then trimmed it to the size I wanted.  The idea here is to make a flap that folds over the top of the box and tucks into the other side.  I covered the box with some pink floral scrapbooking paper, adhering it with double-stick tape, and trimmed off the excess around the flaps.  I folded the bottom like wrapping paper on a gift.


On a scrap of pretty cardstock, I wrote, "Kindergarten Sight Words Memory Game."  Catchy, right?  I stuck the label to the box with more double-stick tape (what did we ever do without it?).  Little Bear was thrilled with the result and insisted on showing Gramma and Mrs. B her pretty new memory game.

Tuesday, November 3, 2009

Personalized Notebooks

When my baby brother, M, turned 12 last month, I just couldn't seem to settle on a gift.  He loves Pokemon and Hot Wheels, but I'm so tired of buying him more of the same thing.  I was browsing through the kids' section of Artmart and feeling quite frustrated, when I called Mom.  I told her my dilemma, as well as the fact that I kept circling back around to this display of blank books with plain white covers.

Mom, being the great mind that she is, suggested I make him a book to write lists in.  It might sound strange, but M loves to make lists; lists of Pokemon characters, his classmates, toys he has,  people in his family, etc.  I could go on and on.  Whenever he spends time with Baby Bear and I, weeks later I will find a list of made-up baseball players folded up in my purse, or will flip open my notepad at work and find a list of all of the fire Pokemon characters.


Working from Mom's genius inspiration, I bought two plain composition books at the local department store for about a dollar each and customized them for M's list making.  I chose the paper I wanted to use, then coated the front cover of the first book with my glue stick.  I lined the paper up with the binding, pushing it just under the edge of the black strip, and smoothed it onto the book.  Once it was firmly adhered, I opened the cover and trimmed the paper around the edges and did the same to the back, and then to both covers of the second book.


I cut shapes from coordinating paper using plastic templates and layered them on the front covers.  I titled the books "Book Of Lists" (original, eh?) and made a matching bookplates for the inside covers.  Next, I labled the first several pages with items to list, such as family members, favorite baseball players, years of Hot Wheel cars, teachers, etc, and wrapped them up. 

I thought it was funny when he opened them and smiled, then asked me why I thought he liked to write lists.  ;-)

Monday, November 2, 2009

Freecycle Fridays

I just love the ideas I find at Not So Idle Hands, especially Emily's Freecycle Fridays!  My favorite crafts are usually the ones I make without spending a dime, but sometimes it's hard to look at all of the things you have - things you see every day and have just become part of the backdrop of your life - and think of creative ways to repurpose them.  Thanks for the great ideas, Emily!


Thursday, October 29, 2009

Easy Sweater Re-Design


Lately, I've really gotten into fashion re-design, which, to me, means new clothes without spending money.  YAY!  Yesterday I came across this idea posted by Brookelynn on Craftzine.com and just had to try it out!

 I was busy last night, finishing Baby Bear's penguin costume, but this morning decided to cut up a sweater to wear to work.  It sounded almost too easy to be true, but I loved the result!  In fact, I'm wearing it as I type this!  This is what I love about re-designing old clothes; you get to keep the features you love, like the soft, warm feel of my sweater, but change the things you don't like.  The sweater I cut up (I'll post pics tomorrow) was boxy and unflattering.  It is much more flattering and stylish as a shrug, I think.  I love how easy it was, but the fabric of my sweater seems thicker than the ones Brookelynn used, so it's a bit bulky in the front.  I'm going to remove a triangle of fabric from each side on the front, next to the sleeves, because I'm picky, and add a big brown button at the neckline, because it'll be super cute!  

Try it out and tell us about your results!!

Thursday, October 15, 2009

Fabulous Felt Flora


I found my glue gun last night (do those pesky craft supply gremlins move your stuff to weird places while you sleep, too?) and decided to do something with this bag of scrap felt pieces I've had forever.  I just cut out four-petal shapes in various sizes free-handed, then covered an old button with another tiny piece of felt, using hot glue to adhere it. I sewed the button through the center of the stack of felt shapes, then hot glued it to an old barrette.  I love the simplicity of it.


What do you think?  I am thinking of making more of them as brooches and headbands, as well as barrettes.  I was also thinking that they would look cute on a handbag or dress up a plain skirt.  I can't wait to make more!  I gotta admit it - I love flowers!

Tuesday, October 13, 2009

Awesome Play Makeup!!


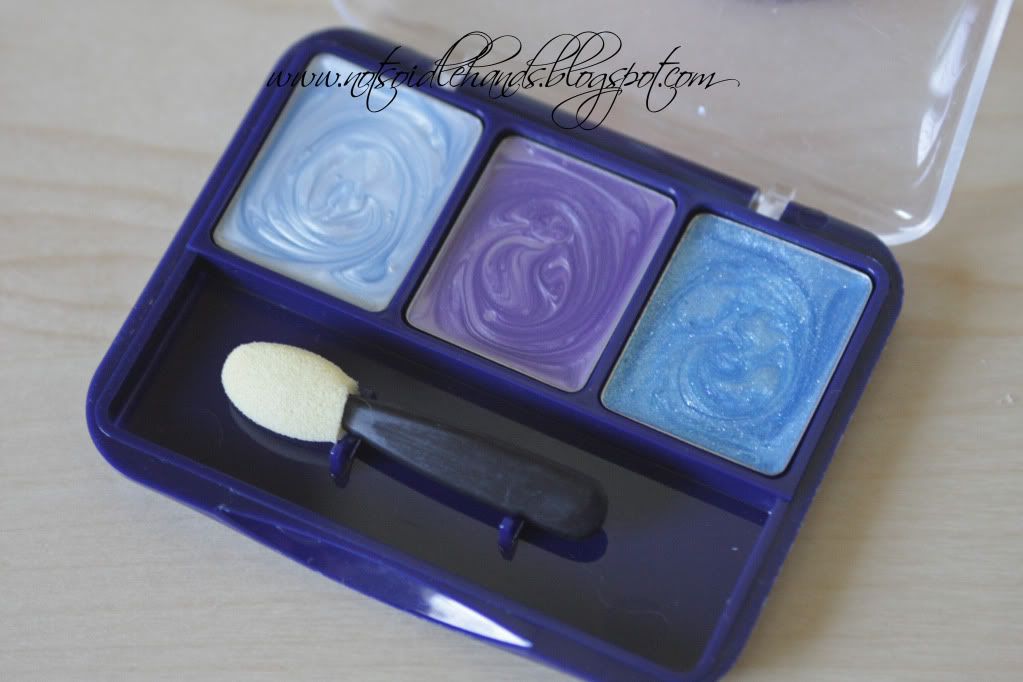
This idea came from Emily at Not So Idle Hands.  She cleaned out used makeup containers and added fingernail polish to create beautiful, fun play make-up for her daughters.  I thought these were so cool and just had to try it out, myself! (the pic on the right is from Not So Idle Hands; the pics below are mine)


I dug through my make-up basket last night, in search of partially used and no longer useful items.  I found three eye shadow containers and one lip gloss case with a nice big mirror.  I cleaned them all out, let them dry, then dug through my nail polish basket (yes, baskets are how I organize) to find just the right colors.  I chose the cheaper polishes and those that were almost empty and got to work.


Just like in Emily's tutorial, I made sure to pour the polish slowly into each little tub.  My hands aren't as steady as hers, but I think I'll get it right with a little practice.  For now, my six year old (HAPPY BIRTHDAY, BABY BEAR!) can play make believe princess without making a big, powdery, sparkly mess.

Monday, October 12, 2009

Find It! Game


I was inspired last week by a game I found online called Find It.  It's basically a clear plastic tube filled with tiny colored pellets and tiny objects to find.  It's a totally self-contained game, which I thought would be perfect for the car. 

I decided to make my own version, of course, and here's how I did it:

I washed an empty sports drink bottle (because it has a wider neck than the individual soda pop bottles do) and let it dry COMPLETELY.  I then removed the label, using GooGone® to remove the glue.  I removed the date stamp from the bottle using non-acetone nail polish remover.

I searched the junk drawer in my kitchen, my desk drawers, the bottom of my daughter's toy drawer, and various other nooks and crannies for items small enough to fit through the neck of the bottle.  I ended up with 20 items - a button, pencil sharpener, feather, chain, toy ladder, paperclip, diaper pin, clothespin, jack, magnet, rock, thumb tack, coin, tag, candle, hook, bolt, chalk, toy gremlin, and an old key.

I put the items into the bottle, then filled it to an inch below the top with salt.  That's right - plain, old, inexpensive table salt.  I then superglued the lid onto the bottle and voila!  A new and mess-free travel game!


This was just a prototype, of course, but my daughter got quite a kick out of it.  We played several times yesterday, with me timing her and counting the items she called out.  Next time, I'd like to use more items.  I think that, for older children or adults, I would color the salt with tempera powder or use a colored material like sand.  For my kindergartener, however, the plain white salt worked perfectly.  Have fun making your own and happy playing!!

Wednesday, September 23, 2009

Need a facial? Don't spend any money; just open your pantry!


I've been trying out beauty product recipes that I've found online and have come up with some basic guidelines:

  • Olive oil is a fantastic skin and hair moisturizer. Yes, it will make you smell like an Italian restaurant, but you can use it at night and wash the smell out in the morning.
  • Regular granulated sugar makes a fabulous exfoliant. Simply add it to your face or body cleanser for a very effective scrub. Salt works, too, but I prefer sugar because salt will sting if it gets into an open wound or is rubbed over dry, delicate skin.
  • A handful of oatmeal, mixed with just enough water to make a thick paste, makes a wonderfully gentle exfoliating scrub.
  • Honey has anti-microbial properties, so it works great as a masque to avoid getting pimples, especially after a good exfoliation.
  • To scent your oil-based beauty products, just buy a little bottle of an essential oil that you like and add one drop at a time. Be careful, though. A tiny bit goes a long way and too much can severely irritate your skin.
  • Many oils also have anti-microbial properties, making them good for acne-prevention, too.
  • Coffee grounds mixed with oil or chocolate syrup makes a lovely-smelling, very coarse scrub. It's great for waking up in the morning, but is probably too coarse for sensitive or delicate skin. Not good for facial skin!
...and some things to be careful of:
  • Petroleum jelly (Vaseline®) may seem like a great base for a scrub or skin masque, but it can dehydrate delicate skin, so I wouldn't recommend it, unless you're making lip products.
  • Do an allergen test on a small patch of skin several hours before you use anything new. You don't want to spread something all over your face, only to find out it gives you hives!
  • Keep all of this stuff - especially the essential oils - away from your eyes. If it accidentally gets into your eyes, call your doctor immediately for instructions.

I've started using my own facial scrub a couple of times a week, consisting of 2 tbsp of granulated sugar, enough olive oil to saturate and cover the sugar, one drop of lavender oil and one drop of clove oil. I get dry patches on my face and this really seems to help, without causing acne like the store-bought deep moisturizers can. I've just had to try them out to see what works for me. Let us know what works for you! :-)